Showing posts with label crafts. Show all posts

Tuesday, March 15, 2016

In a Scrapbooking Groove

Do you go through phases where you just cannot get enough of a certain activity?  I am currently in one of those with scrapbooking.  Maybe it's because I've moved my supplies so they're clustered in one space, or because I am keeping my supplies out in that same corner, or that there's more sunlight in the evening, or it could be that I'm using it as an escape from all things wedding related that are burning me out. ha!  No matter the reason, I have in the past week been scrapbooking non-stop. 

Last weekend Shimelle hosted a bunch of challenges and I stole a few minutes away to participate.
This challenge was to go back to an 'older' collection, Shimelle's first.  I actually did have half the paper pad and a few embellishment bits sitting around - sweet!
These photos are slightly gross out of focus ones from my phone, so the layouts look better in person, but better blogged than perfect!

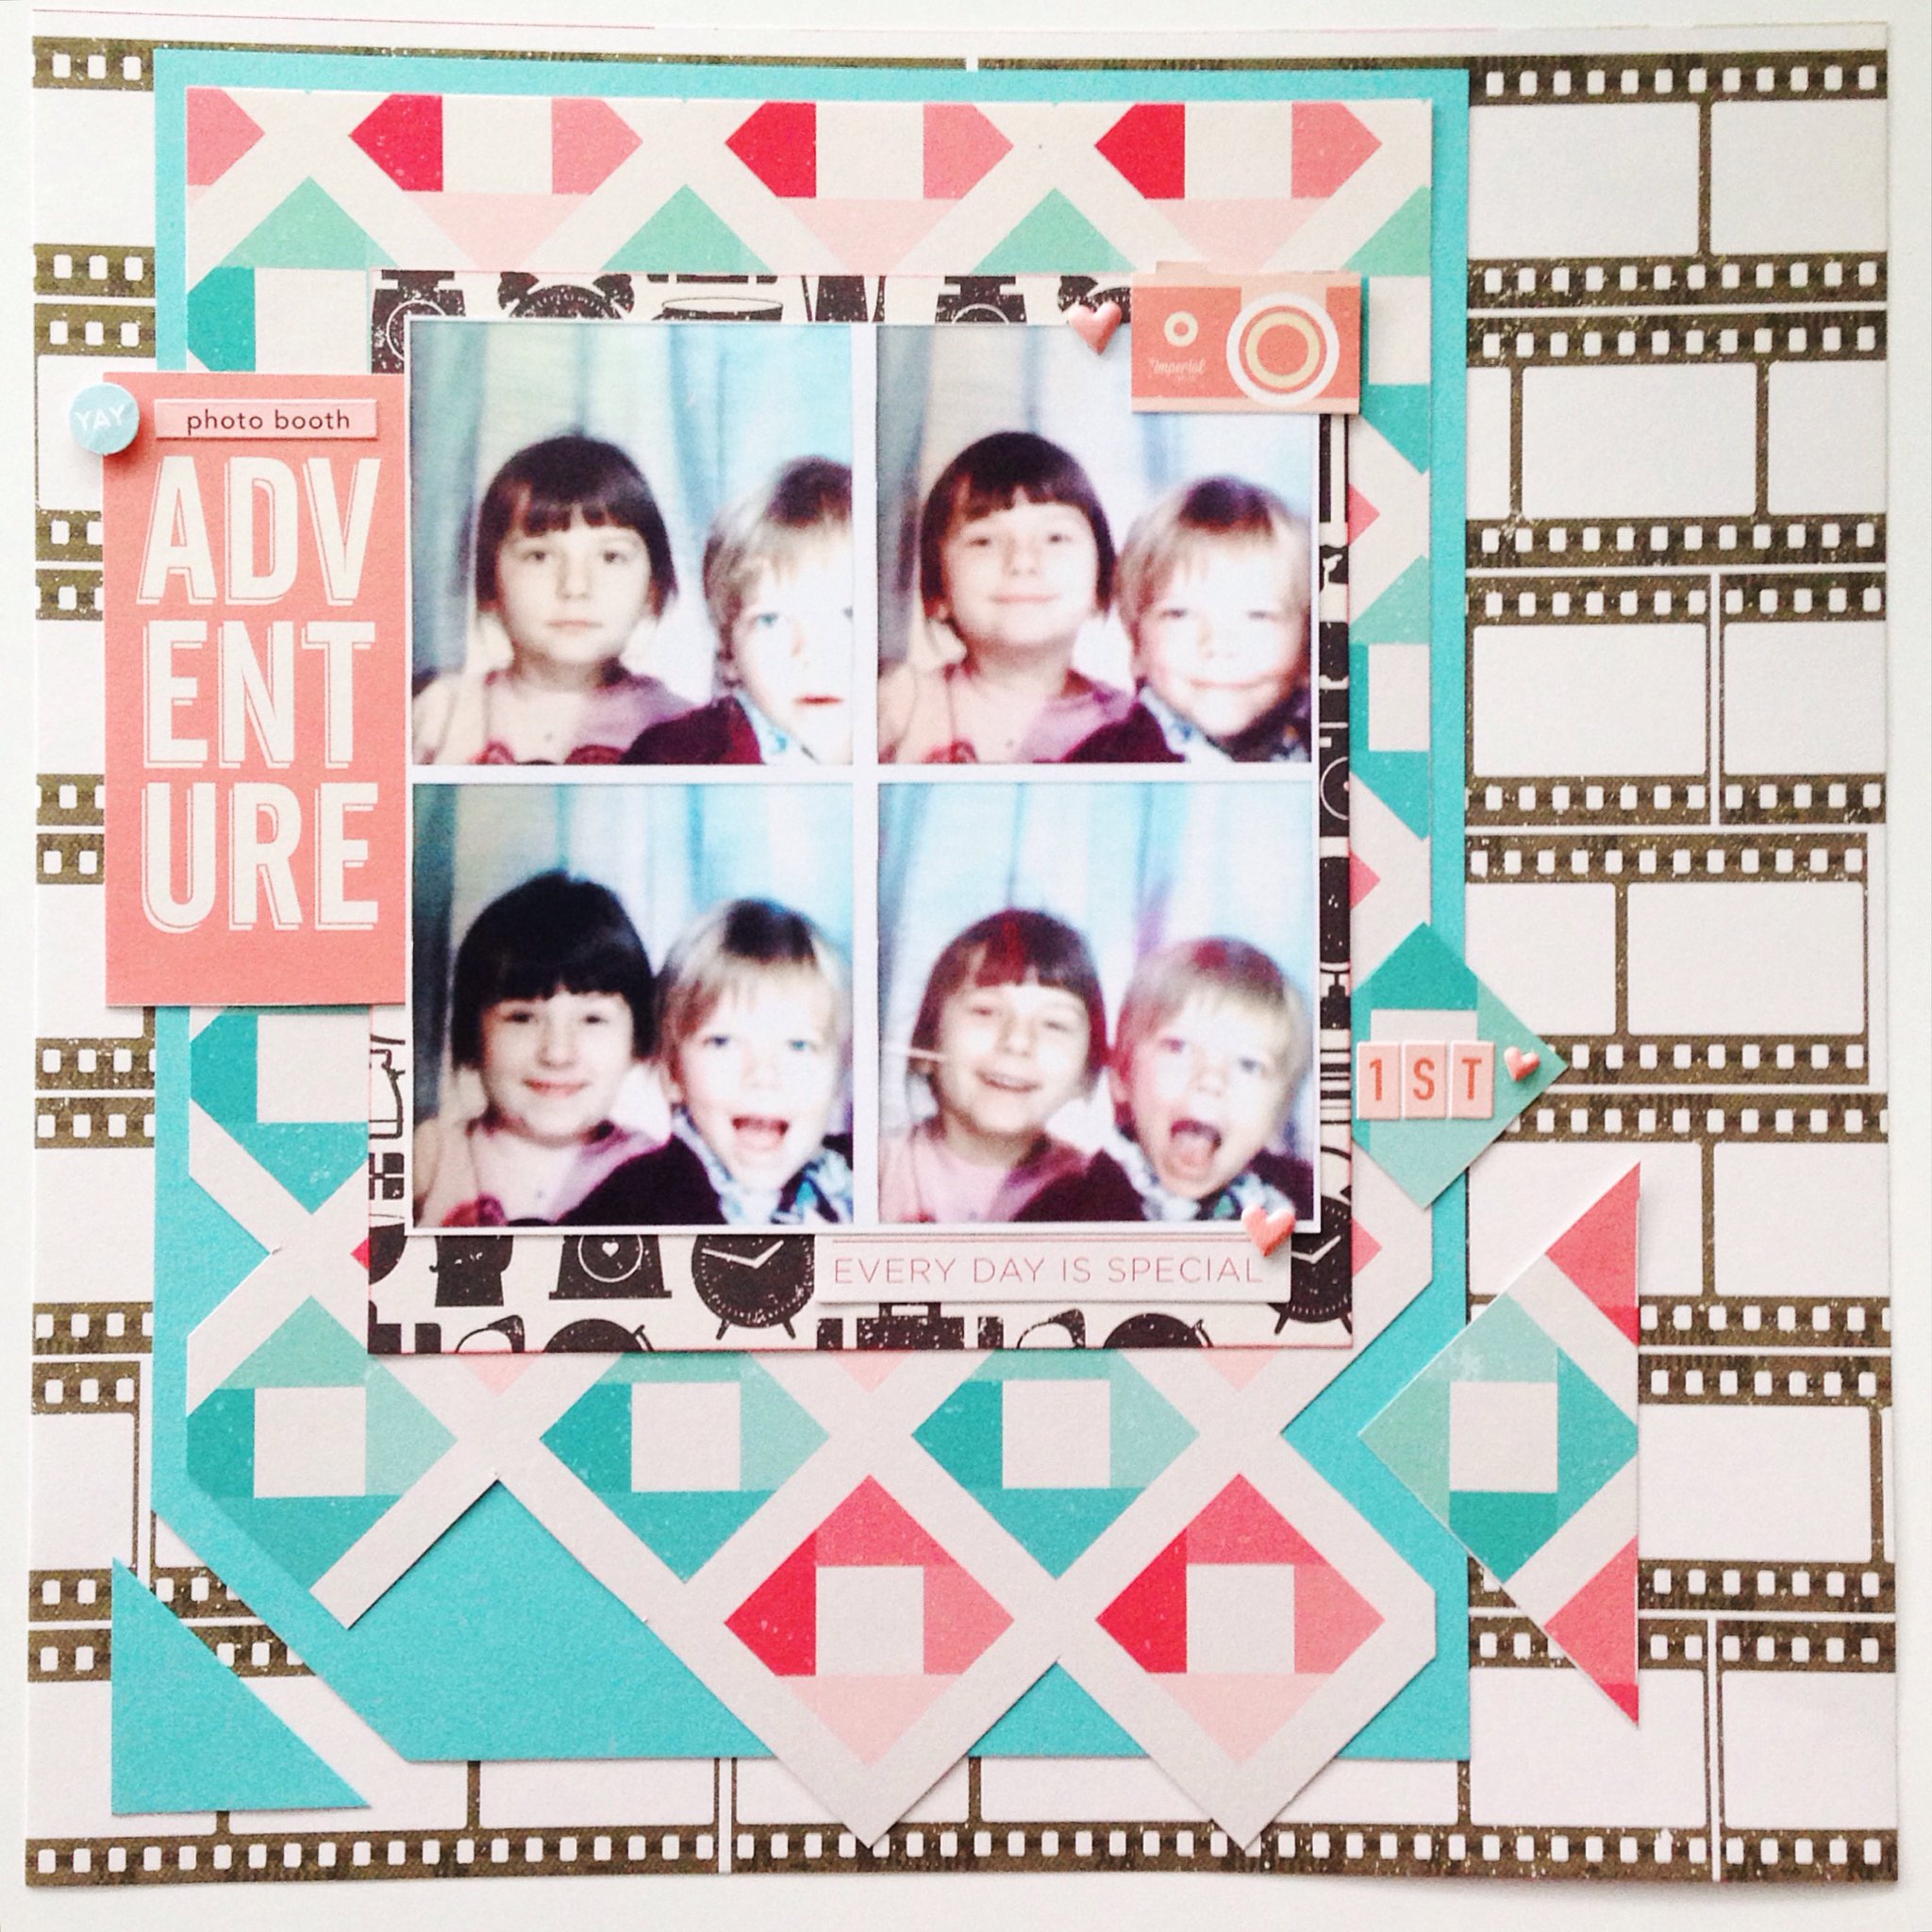
This first layout is about the very first time my brother and I were in a photobooth.  I love how the looks on our faces change as we "get it."  I think everything on this layout is from the Shimelle collection, with the exception of the tiny "yay" circle, which I think was from one of my Studio Calico Project Life kits.
This next layout was a fun one because I found an old teeny print from the Oldies Dance we went to in 2013.  The whole thing is made with the Shimelle collection.  I will add journaling later, but for the purposes of sharing on Instagram, etc.  I'm going to keep personal notes private. :)
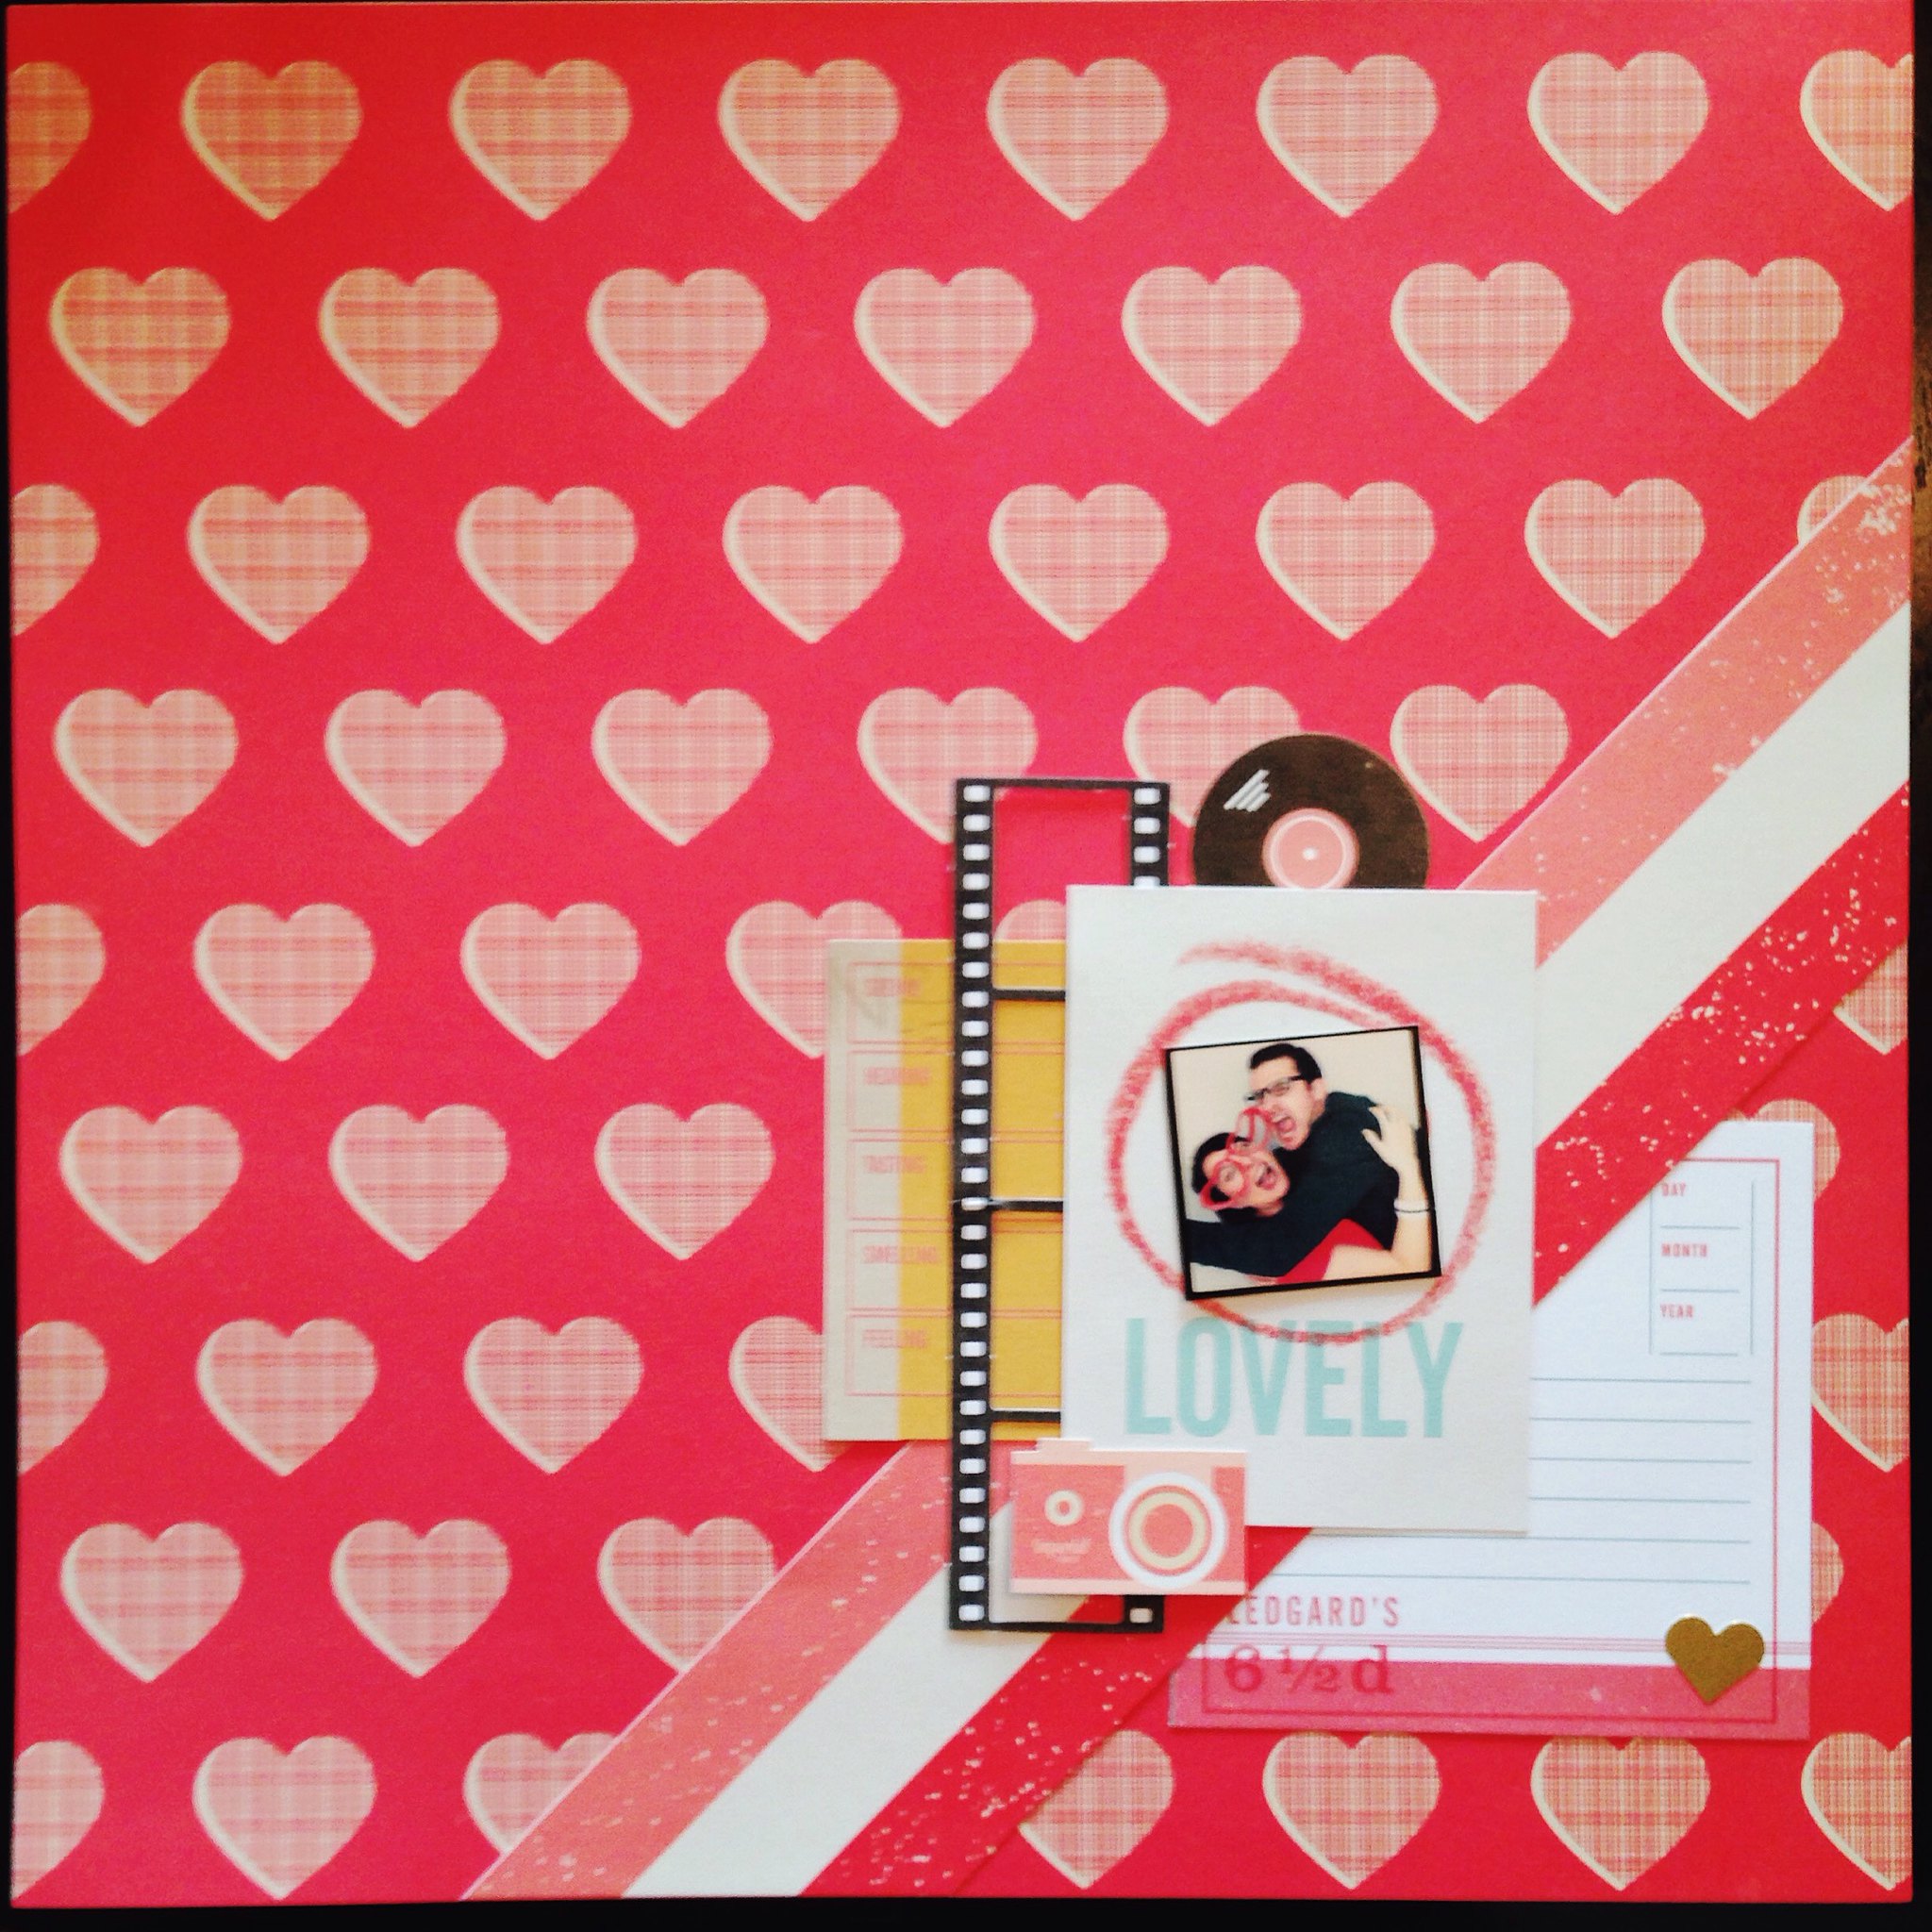
 
 
This last layout is one from my 2015 Project Life album, which I am still chugging along at.  The 6x8 pocket has more Shimelle stuff, but the rest is a mish-mash of Studio Calico and the We Are Memory Keepers Love Notes collection by Amanda Rose Zampelli.  I have been making Project Life style albums since 2012 and I really love it.  This spread is from a not-so-ordinary 7th anniversary/day we got engaged, but normally I really enjoy capturing life's smaller moments in an album.  I am usually a little bit behind, but currently the lag is epic! This layout is from July 1st.  But I have been scrapping a lot lately, so I feel like I can catch up before long. 
 
 Do you scrapbook?  Have any questions about scrapbooking or Project Life? I'll try to post more layouts again soon!
Mel

Tuesday, March 6, 2012

In love with Scrapbooking Again

3 years ago, just before starting this blog, I quit my job at the Urban Scrapyard to move to a new city so Steve and I wouldn't be living long distance anymore.
At the Urban Scrapyard (now closed, sadly) I worked full time with everything scrapbooking.  I made sample layouts and kits for the store, taught classes, and designed and planned for customers.  I loved it.  At the time I was also going home at night and scrapbooking a book for Steve about our first year together.  It was great, until I got burnt out.  And then I didn't scrapbook a single thing for 3 years. 
But now I'm back to it and loving it again.  It's amazing how liberating it feels to create without rules and make a mess of our dining room table.  And! printing pictures and doing things with them instead of stashing them on hard drives!
Here are some pages I've made lately.
With the girls - did you know that at a party, if you talk with your glass in front of your mouth, no one will hear you?  ;)
What colour is blush?  While my mom was in Toronto we went hunting for blush coloured lace for my aunt - but what colour is that exactly? (in the end - it's the one on the top right)

What's in my bag.  I used the photo of my bag contents from when I was working in France.  I need to take another shot like this soon - my purse contents have changed a lot.

Vintage Enamel Flower Pins.  About my obsessive need to look for these at every yard sale, flea market or thrift shop I ever see.

Happy Reading.  All of the little mini paper books along the layout are what I've read lately. 

2 peas in a pod.  An old photo of my friend Shannon and I -  when I saw this paper, it was perfect for a page about us. 

Thankful for having my grandpa around as a role model while I was growing up.


Do you scrapbook?  Have you ever?
If you have questions about it let me know!

Friday, February 17, 2012

Crafting in Toronto - Ribbons and Trim at Sussman's Bridal

I love Crafting. 
I live in Toronto. 
When I first moved here it seemed tough to find craft supplies.  The closest Michael's was in Missasauga.  (Now it's at Wilson station.)  However, I was able to find what I needed through some searching and I discovered some of the best craft shopping on the planet.  Here's the maiden post in a new series that will hopefully help you get crafty and keep these local businesses thriving.

Up first a Notions and Trim shop: Sussman's Bridal Supplies.  
Don't be fooled by the name.  One half of their business is locally designed bridal gowns, but the other half is a cute little shop stacked floor to ceiling with ribbons, feathers, lace, zippers and hundreds of other goodies. 
Have a look.
That's my mom, by the way.  She was visiting for a couple days and on Monday we were on the hunt for a specific colour of lace ribbon.  We came to the right place.
I need an event worthy of yards of sequins - or to convince Steve to make our kitchen a disco.
They have a wall full of panels of silk flowers and appliques - hundreds of choices. 
Did I mention the gorgeous selection of feathers...

I'm going to go back to get feathers to fill a vase.  And make a fascinator.  And rack my brain for a Halloween costume idea.  And wallpaper my apartment with them...
All in all it was a very successful trip.  My mom found a whole sheet full of samples of what we were looking for, and Norma who was working was incredibly nice and really helpful. 
The prices are reasonable and sometimes surprisingly cheap.  I picked up some ribbons to make some bookmarks and will definitely head here as my first choice for trims again. 

You can visit Sussman's at:
420 Queen Street West 
(Between Spadina and Bathurst on the North Side)
416 703 1160


This was not a sponsored post.  I just want to feature some of my fave places in the city before they disappear, like some from the past already have. 

Do you have any fave places to craft shop in Toronto?  Anything you can't seem to find?
If you don't live in Toronto but want advice before you visit, let me know :)

Friday, November 4, 2011

Making my Mom's Birthday gift (Saucer turned necklace)

Now that my Mom has safely gotten her parcel in the mail, and is enjoying her necklace, I can show you.  It all started with a trip to Goodwill.  (It usually does.)  
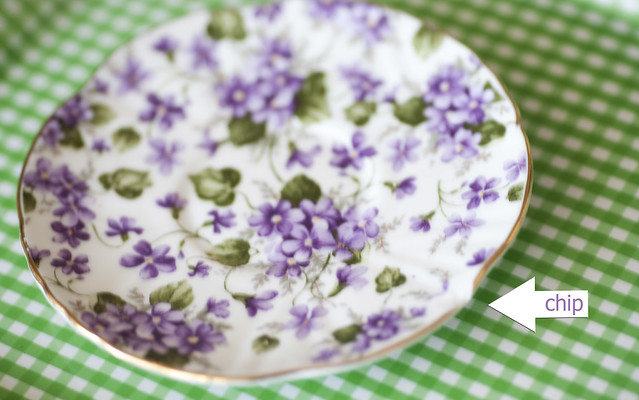
I found a really pretty teacup saucer that was chipped.  
I wondered if it was possible to save this lovely pattern from a trip to the dumpster. 
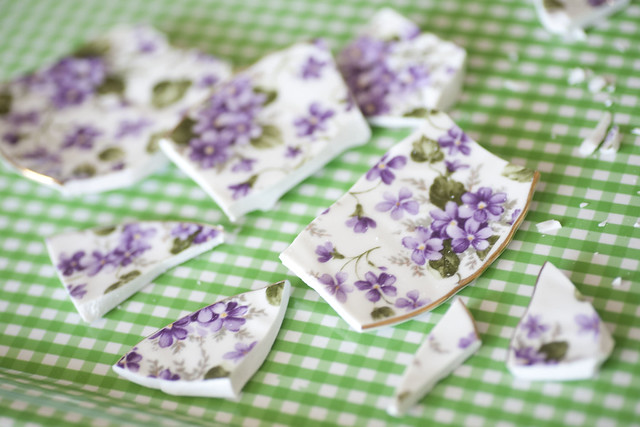
So yes, I took my cute little chipped plate, put it in a sealed plastic bag & dropped it on my tile floor.
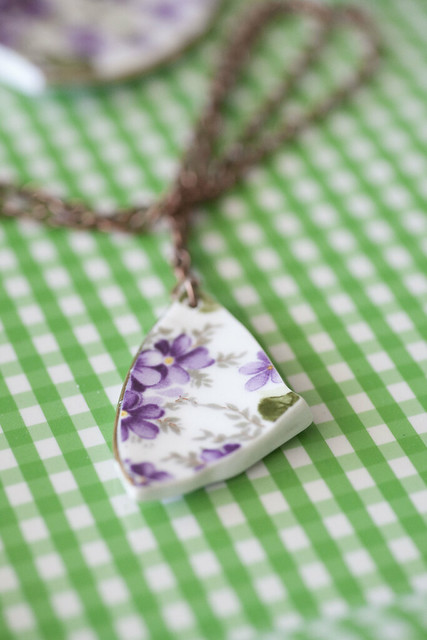
Post-smash I chose my favourite little remain and drilled a hole in it with my rotary tool.
About an hour of cautious drilling later.
I also used the tool to sand down any rough and sharp edges, then added a jumpring and some chain.
And there you have it - the necklace I made my mom for her birthday, which just happened to look perfect with the purple sweater I bought her too.

p.s.  I toyed with the idea of adding some beads or little charms, but knowing my mom's taste, I kept it simple.   However, I do have a few pieces of pretty plate left, and may make some other variations.
I've also since found some more chipped plates and saucers - score!


Monday, October 10, 2011

How to Make a Ribbon Wreath for Fall - DIY


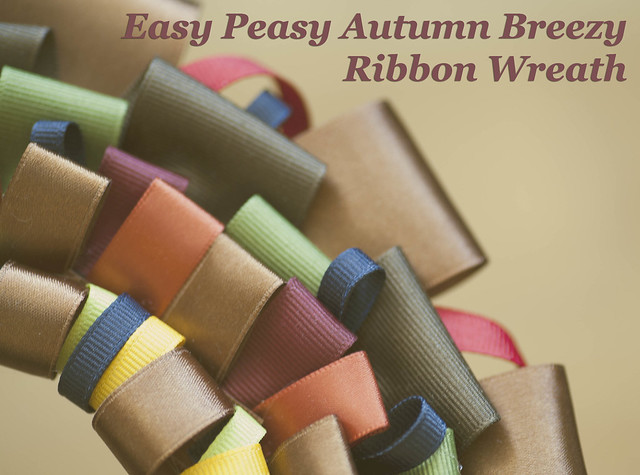
I was in the mood for something festive for our apartment door, so I put this little wreath together. 
I wanted something that was small and easy to store in our little apartment.  Not much space for big foam wreaths around here.   It's so easy and simple that you can do it late at night, while catching up on tv shows, and not miss any jokes or plot points.
Speaking of late at night, please excuse the crummy process photos - it was a night too lazy to pull out the SLR and light things.  

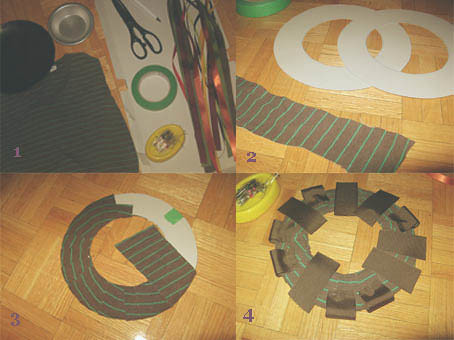
1. You will need:
Cardboard
Loads of Ribbon in several colours and widths (I believe I used 9 yards)
Spare fabric (I used an old t-shirt)
Hot glue gun (or a lot of straight pins)
Scissors
Tape
2 round objects to trace
2.  Trace round objects and cut out circles in the cardboard.  Mine was thin so I doubled up.
 Also, cut fabric into strips - 3 or 4 inches wide. 
3.  Wrap the fabric strips around the cardboard circles until the cardboard is hidden.  Secure the ends. 
4.  Cut ribbon into roughly 4 inch lengths for wide ones, 2.5 inches for the skinnies.  Place them evenly around the circle.  Fold in half, allowing for a pretty ribbon loop and pin or glue to the wreath.  Repeat until your wreath is full and you've run out of ribbon!
voila!  A sweet little wreath to decorate your door (or your floor, as seen here).
I hope you had a great weekend, whether you celebrated Thanksgiving like us Canadians, Columbus Day, or just the end of the week :)
I'm so thankful for the phenomenal weather we had!

Sunday, September 18, 2011

Wish I could have bought: at Renegade Chicago

I still have to sort/edit/print/scrapbook/blog the pictures I took in Chicago, but I thought I should at least share something(!) from our trip there. 
I was thrilled that the Renegade Craft Fair would be on while we were in town.  So of course I headed to Wicker Park to walk around and check it out.  It was great ! 
I spent all of my money I had brought, picked up some Christmas presents as well as goodies for myself, and endless inspiration for future craft projects. 
I wanted to buy so many things, but couldn't get them all - so I collected business cards to make this little list of coolness to share.


Enjoy the links, and thanks Renegade crafters for sharing your talent!

Friday, August 5, 2011

Crafty links & things.

I browse online a lot.  And I make a lot of bookmarks. 
I really make too many bookmarks. 
And so, in what's finally a brilliant idea - I will share the links here.  I'll still be able to find them, and you can share in the fun of cool things online. 
I am also on Pinterest - where I save pictures of pretty things. 

Arigami - the art of making things out of balloons.  Incredible things - like ballgowns, clones of yourself and this giant octopus. 
Inkodye - a crafty paint that activates in sunlight - they have a few cool DIY projects worth checking out, I'd love to try this.

Did you know that Sharpie has fabric markers!?! I haven't seen these in Canada yet, but will be going State-side soon and will hunt for these!
Another reason for me to have an iphone.  Because when I don't have an iphone, I can't use the Instagram app, which means I can't order this mini book of my photos from Printstagram.
I don't have an iphone.
( I hate those commercials rubbing it in my face, btw)
Over at the Design Dazzle blog you can make your own bubble wand kit - for making gigantic bubbles!
This was my fave thing ever as a kid, my grandpa would make the best ones, my brother would always pop them.

And for those who are less crafty, and more shop-crafty, did you know about this tool ?  You can browse Etsy (or ebay) listings with loads of photos at once - making the hunt much quicker.  This is what I found when I searched for my favourite vintage enamel flower brooches. 


Alas, that's it for this week, I'm sure I'll have more soon!


Tuesday, June 21, 2011

52 weeks - week twenty-three.

graci8441 by melaniegodecki
graci8441, a photo by melaniegodecki on Flickr.
This weeks portrait is of the crafty gal Christina, of www.getcraftee.com.
We were paired together as Happy Mail partners back last summer, and we met for the first time this weekend.
Hilarious how much we both enjoyed threading all the needles - it's so soothing!
Not as soothing - having dozens of needles dangling in your face and trying to look good :)

Friday, October 8, 2010

using just a teeny amount of your vintage fabric for a craft. fabric ring.

i don't know about you, but when i find vintage craft supplies, fabric, beads, etc, i find it very hard to use them. it has to be the perfect, worthy, not going to fail, 'i'll never regret cutting the fabric' craft.
this was easy enough, it used about a 4 inch square altogether.
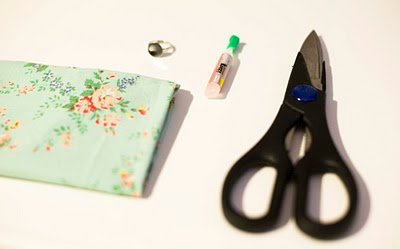
you will need: scissors, some fabric, glue, a ring base & if you like - a bead
cut the fabric into circles. i chose ones that were just under an inch across.
(i cut 16 but only used 8 for the final product)
fold the circles in half, then in half again to end up with a triangle shape. glue to the ring base.
continue layering the triangles with glue until your ring is nice & full. then add a bead to the centre.
voila.
i think this would work even better with lighter weight fabric than i used. i have some sheer blue fabric to try next. have fun and let me know how it goes if you make one :)
p.s. is anyone else mourning the loss of daylight yet?
it's already too dark to photograph crafts at night!

Saturday, August 28, 2010

i like to scrapbook. :)

and i even used to do it.
my scrapbooking supplies and i have been apart for a long while, and while the weather seems too nice to sit inside and create a page, i am reminiscing about my love for the craft and looking forward to spending chilly nights with a silly girlie movie, my paper cutter, gluesticks and stacks of paper. 
here are some of my fave pages:
image_large_266658
my papa (grandfather) in a photobooth circa 1957


image_large_252626
my shoes (though this page is a few years old now, i may have to match it with a whole new set - i can only see 3 pairs that i still own!


image_large_253371
i made a scrapbook for steve for our 1st anniversary.  i love papers by bampop!


image_large_246254
i think this one takes the cake as my fave page ever.  thanksgiving 2008.


image_large_260340
from the time i tried to call steve from a payphone in paris.  he didn't get to the phone on time and i left a machine message.  my credit card was later charged $42.00.  super lame!


image_large_245994
this is my cousin melissa, in a pic i took ages ago.  but it was fun to use rockstar papers, because you know, she's like that ;)

if you'd like to see more - my set is on flickr here.
and do you scrapbook? i'd love to see your layouts too!

Friday, June 25, 2010

how to make a newsboy cap

this may seem like a random thing to post but i can explain.
i am currently working on a historical documentary film. as half of the 2 person wardrobe department, which includes, among other things, dressing about 400 extras over 2 weeks of filming.
date range from 1910-1936. whoo hoo!
it's keeping me busy from roughly noon-2am for 3 weeks.
here's a scene they want to recreate:
and so - the newsboy caps.
cut out a pattern that looks like this - essentially a large circle with a smaller one inside.
i've got 22 inches across the big outside one, then within it drew a 16 inch one. folding the paper made it easier to cut the triangular wedges out.
for the moon shaped piece i traced the edge of a baseball cap and it's about 3 inches across at the centre of the 'moon.'
in a tweed-ish fabric, cut one of the large piece and 2 moon shapes. then cut one moon of cardboard or plastic. (i used cereal box cardboard but i'd recommend something more solid & washable if you'll be using the hat for more than a one time costume - ie part of a pop bottle. you'd also want a lining.)
p
pin the brim pieces together and pin the large piece so each triangle cut out becomes closed again.
the hat will start to take shape...

when sewing the main part of the hat, curve toward the centre as you go - it will make the hat more circular on top. put the cardboard in the brim and sew it right sides together to the main part of the hat. tada.
that was easy right? uhhh... ha ha sorry. it is more simple to do than it is to explain...
repeat as needed.

i'll see you again when the film is wrapped. so happy canada day this thursday!

Update:  While I appreciate the interest, I have been getting emails and questions about this post daily.  It has been over 4 years since I have made the hats.
Yes the pattern size was as described.  If the hat is too big, sew with larger seam allowances and remember that the floppy excess gets pulled forward and tacked to the brim. 
Adjust the pattern for hats for children. 

LinkWithin

Related Posts with Thumbnails