Showing posts with label Check out what I made. Show all posts

Tuesday, March 15, 2016

In a Scrapbooking Groove

Do you go through phases where you just cannot get enough of a certain activity?  I am currently in one of those with scrapbooking.  Maybe it's because I've moved my supplies so they're clustered in one space, or because I am keeping my supplies out in that same corner, or that there's more sunlight in the evening, or it could be that I'm using it as an escape from all things wedding related that are burning me out. ha!  No matter the reason, I have in the past week been scrapbooking non-stop. 

Last weekend Shimelle hosted a bunch of challenges and I stole a few minutes away to participate.
This challenge was to go back to an 'older' collection, Shimelle's first.  I actually did have half the paper pad and a few embellishment bits sitting around - sweet!
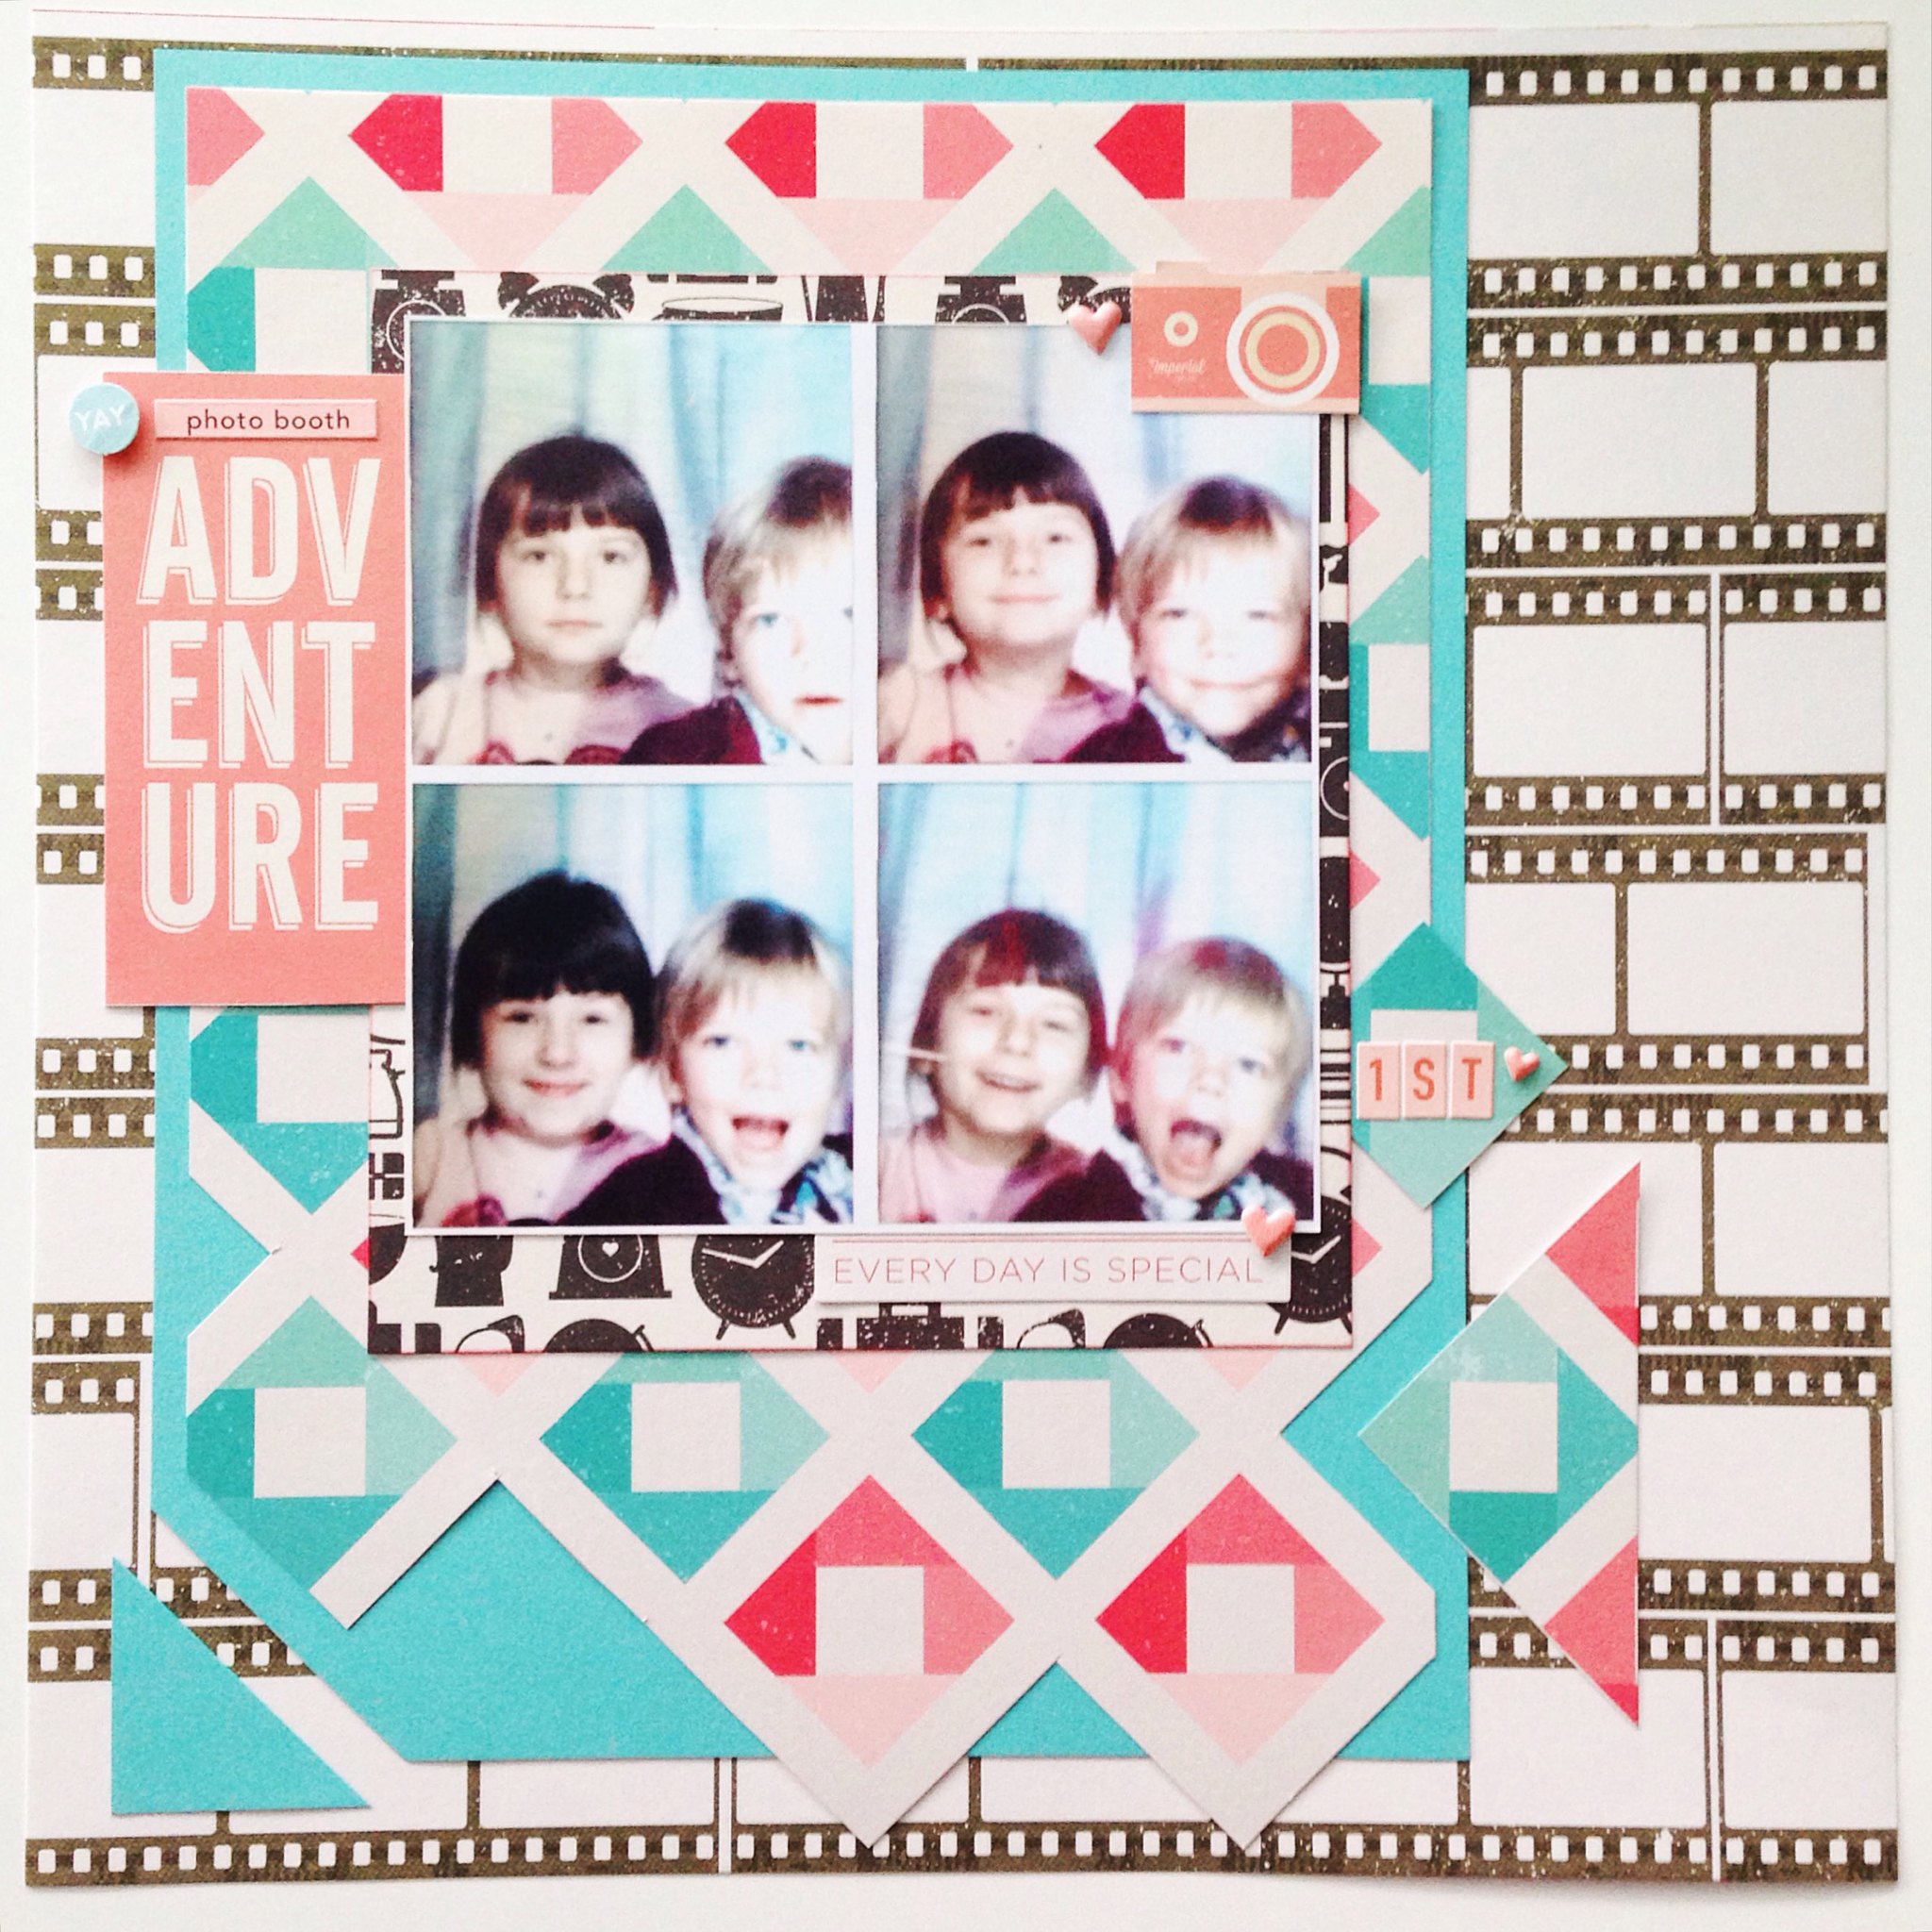
These photos are slightly gross out of focus ones from my phone, so the layouts look better in person, but better blogged than perfect!

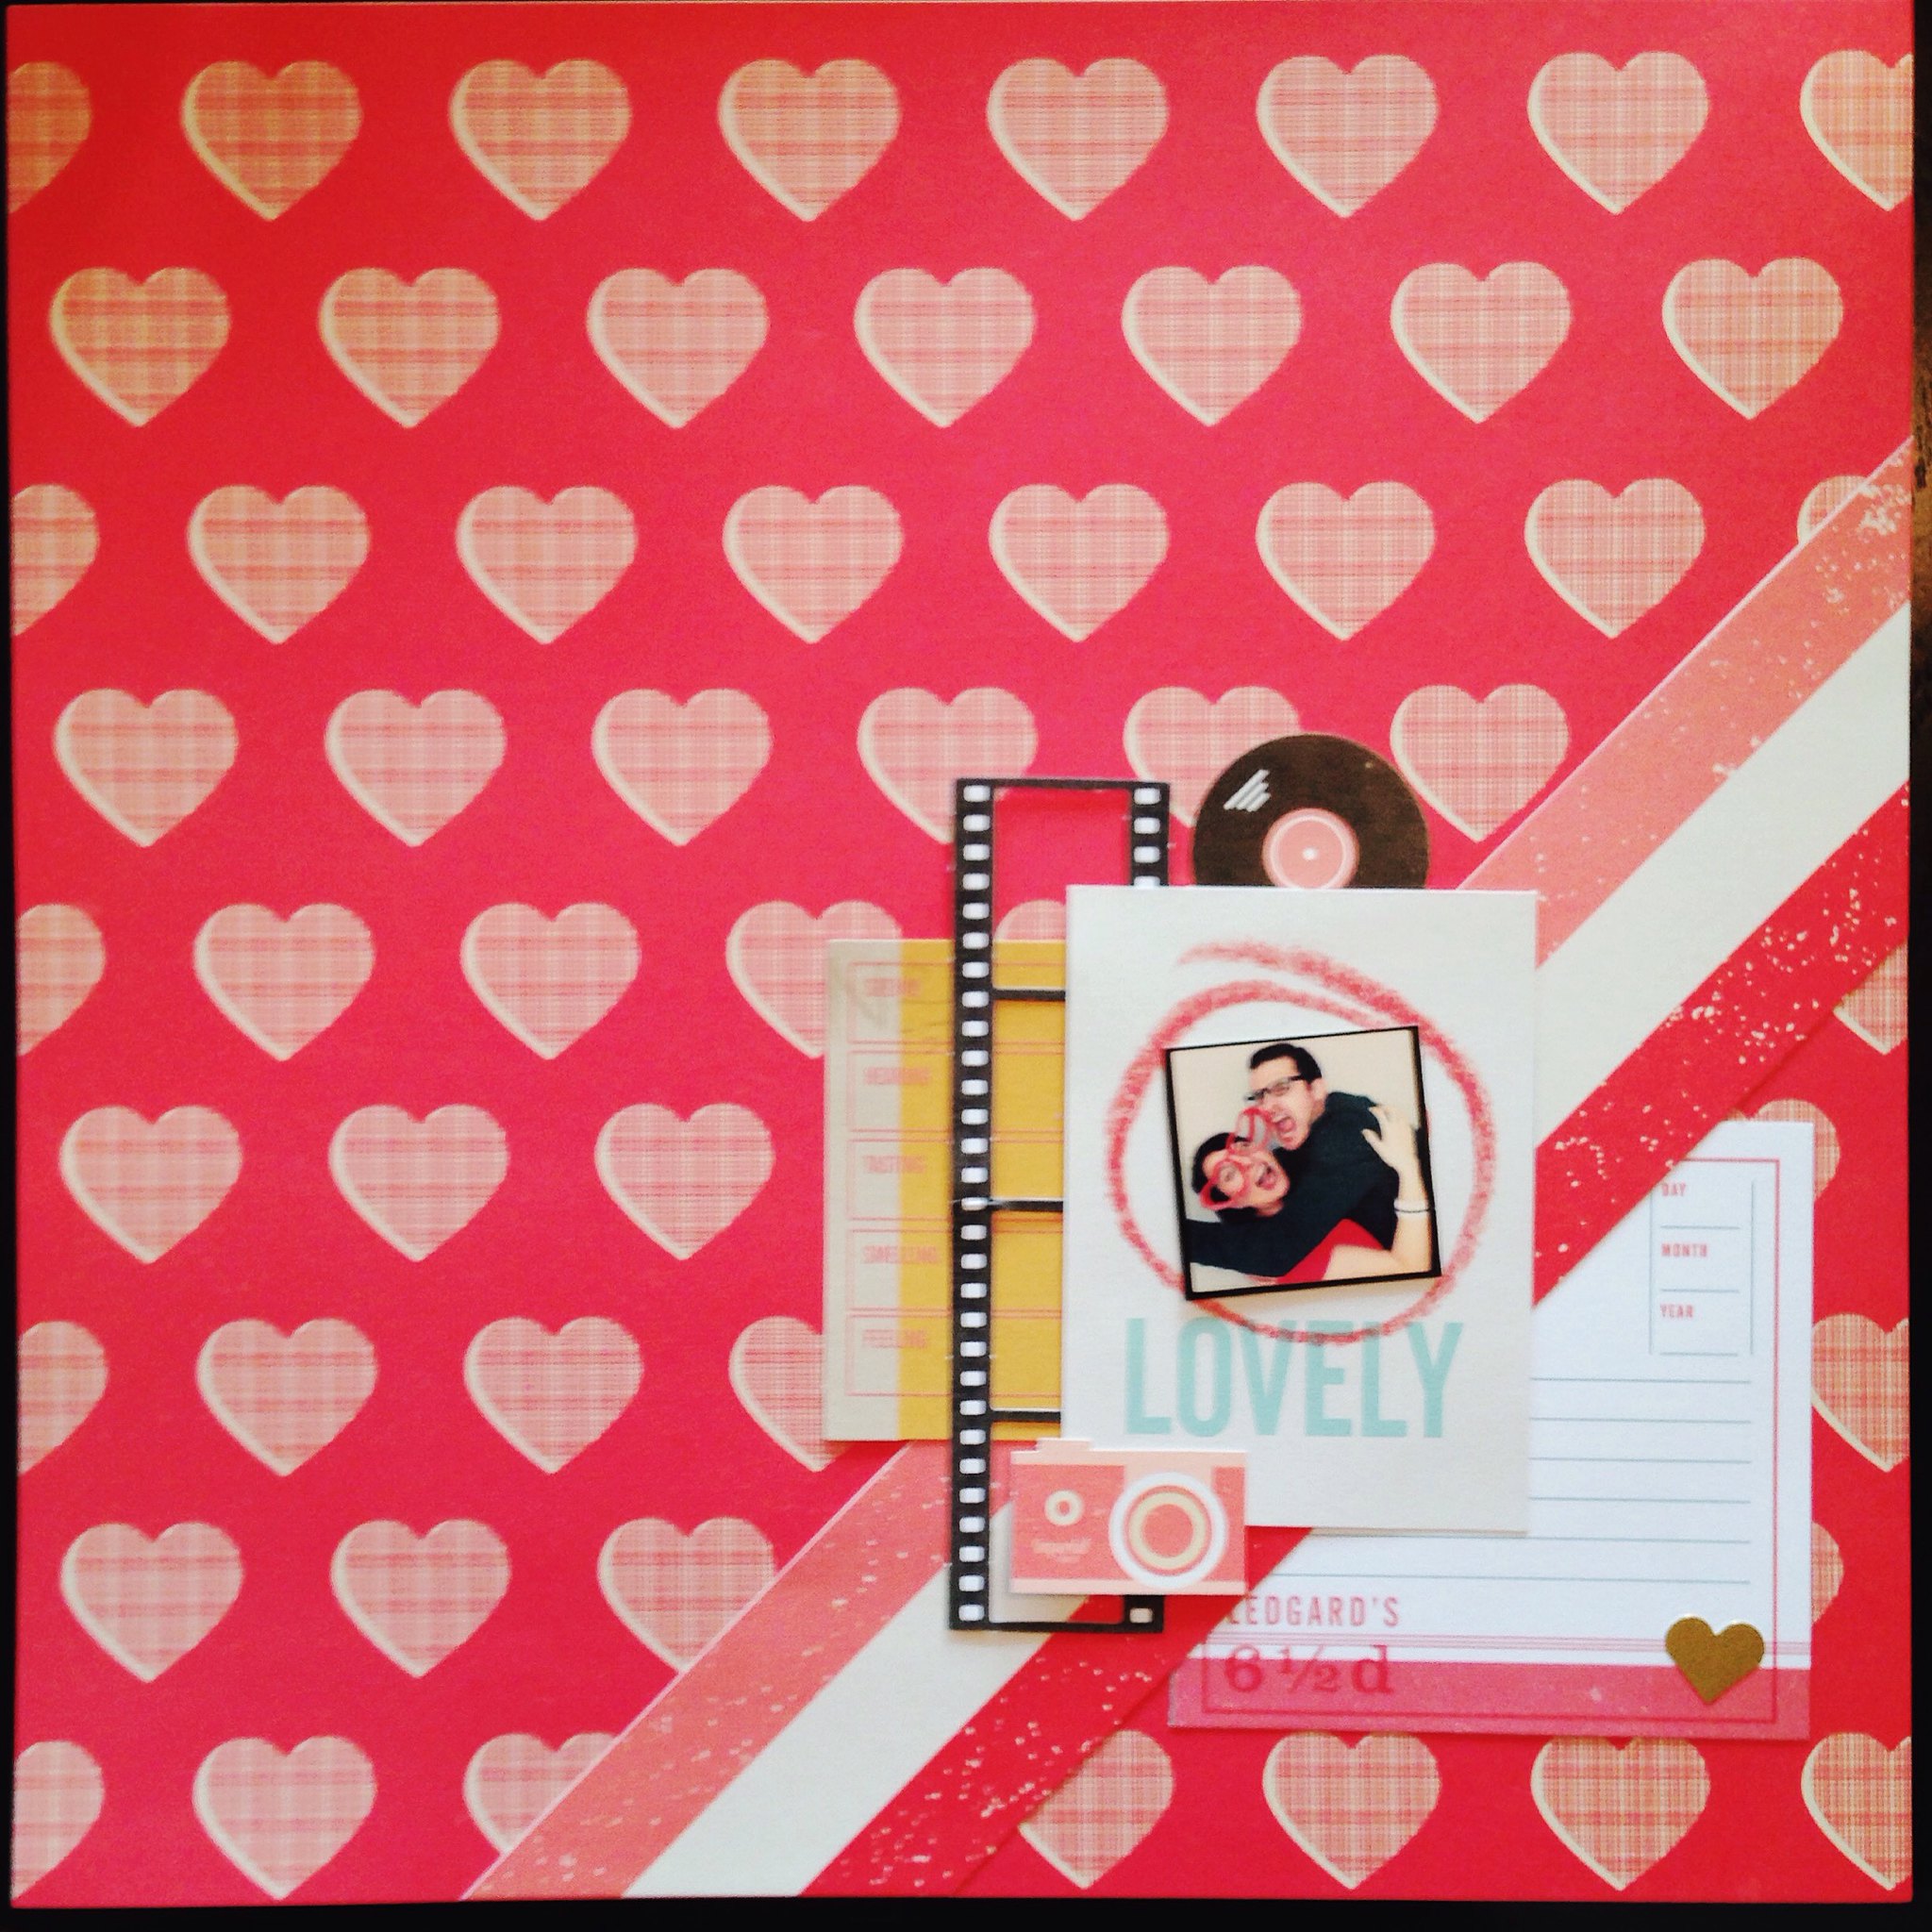
This first layout is about the very first time my brother and I were in a photobooth.  I love how the looks on our faces change as we "get it."  I think everything on this layout is from the Shimelle collection, with the exception of the tiny "yay" circle, which I think was from one of my Studio Calico Project Life kits.

This next layout was a fun one because I found an old teeny print from the Oldies Dance we went to in 2013.  The whole thing is made with the Shimelle collection.  I will add journaling later, but for the purposes of sharing on Instagram, etc.  I'm going to keep personal notes private. :)
 
 
This last layout is one from my 2015 Project Life album, which I am still chugging along at.  The 6x8 pocket has more Shimelle stuff, but the rest is a mish-mash of Studio Calico and the We Are Memory Keepers Love Notes collection by Amanda Rose Zampelli.  I have been making Project Life style albums since 2012 and I really love it.  This spread is from a not-so-ordinary 7th anniversary/day we got engaged, but normally I really enjoy capturing life's smaller moments in an album.  I am usually a little bit behind, but currently the lag is epic! This layout is from July 1st.  But I have been scrapping a lot lately, so I feel like I can catch up before long. 
 
 Do you scrapbook?  Have any questions about scrapbooking or Project Life? I'll try to post more layouts again soon!
Mel

Tuesday, January 26, 2016

A Mad Men Party - Finally!!

I can't believe it was the summer of 2007 when I first saw AMC's trailer for the upcoming Mad Men series.  One look at the costumes and set design and I was hooked.  About 3 minutes later I wanted to throw a Mad Men theme party.  Fast forward a while... I finally squeezed in a party on the night before the finale.

We also got a new couch a few months prior, and it fits the bill pretty perfectly. 

I had a lot of fun making the food for this party.  I have a small stash of vintage magazines, so I used recipes straight out of the 60's .  Change is a good thing - especially when it comes to avocado based dips.  No that is not guacamole! It is avocado and mayo and it was a sad waste of a delicious perfectly ripe avocado.  *sob
The deviled eggs, cheese ball and french onion soup dip were fairly classic.  But on the sweet side were these gems: pineapple rings surrounded by Jello, and ambrosia salad.  
Steve spent a solid chunk of time mixing drinks.  
We offered Tom Collins, the Blue Hawaiian, Old Fashioned and Mint Juleps.  
These fake ciggies were absolutely worth the effort.  They're the breadsticks that come in Handi-snack packs, dipped in white chocolate then red sprinkles and served in a thrifted ash tray complete with ash made from sugar crystals.  They were delicious and also added that extra element to everyone's photo poses, haha.
One of the things I love most about my friends is their willingness to participate.  Maybe my prize for best costume would have influenced things, but there were some great outfits.

It was a great night and I'm so happy! Better late than never!


Sunday, October 28, 2012

Count to 30 - #21. Costumes.

I know this list thing has been going for a while... but I need to finish this!

Here are 21 couple costume ideas.  Some I've used, others not yet.

 1.  pirate and mermaid
 2.  April & a Ninja Turtle
 3.  Bonnie & Clyde
 4.  Velma and Scooby Doo
 5.  Kermit & Miss Piggy
 6.  Willy Wonka & an Oompa Loompa
 7.  Peter Pan & Tinkerbell
 8.  Spy vs Spy
 9.  Woody & Buzz Lightyear
10.  Dorothy and a tornado
11.  Romeo & Juliet
12.  Marty McFly & Doc Brown
13.  Lucy & Ricky from I Love Lucy
14.  Kickass & Hit Girl
15.  Medusa & man made of stone
16.  Candyland characters
17.  Red Riding Hood & Big Bad Wolf
18.  George & Judy Jetson
19.  Katniss & Peeta (cool facepaint for him)
20.  Carl & kid from Up
21.  Our costume this year:
Indiana Jones and the boulder
This costume was a lot of fun.  It got extra funny when Steve and I were split apart at the party.  People guessed he was all kinds of things, from honey-glazed Timbit to a moldy falafel.  Any of those work really. It's too bad the foam didn't last for it to be reused next year.  ;)

(I made Steve's costume using a hot of hot glue and carpet underlay foam from the Home Depot, then paint and spider webbing.  Mine is a mix of pieces from outlet stores and a black dollar store hat which I painted. )

Hope you had/have a great Halloween!  That's it for us with this party, and maybe seeing some trick-or-treaters in the building lobby on Wednesday.
What are you up to?  What's your costume?


Friday, April 27, 2012

Happy Spring News - published


I just received an email from Ruche, letting me know their Spring DIY guide is published.
You may remember this post about arranging a cheap bouquet - it's on pages 14-17.
It's so nice to see photos laid out perfectly in a magazine. 
Check out the issue - it's full of pretty ideas to celebrate spring.

This makes me want to:
Take graphic design classes
Publish my own mini magazine/lookbook
Buy more bouquets of flowers for my dining table
Find more places to get my photographs published
Paint the walls of my apartment (that pretty blue is a blanket I taped to the wall for these photos, ha)
Photograph more DIY projects
Find more pretty linens for our new apartment

Hope you are having a great day - Happy Friday!

Sunday, February 12, 2012

Pinned it. Made it. Ate it.

One of my favourite things to pin on Pinterest is recipes.  I love the endless supply of tasty food photos and easy ideas to be found there.  The key is to try them.  And lately I've been on a roll.  
Just snapshots of what was made - I have a hard time staging a photo when I'm hungry. 

These were great! We had friends over and the general consensus was that regular lasagna would never be made again.  The best part is that everyone gets crunchy corner bits. 
The only snag I ran into was trying to make them in my silicone muffin pans at first.  They didn't work at all.  The pans weren't stable enough to hold anything and the lasagna didn't crisp.   Those pans have since been replaced with metal ones. 

These were good, but I don't know that I'd make them again.   After reading the nutritional info on the coconut ingredients, I don't think the extra saturated fat, etc.  is worth the coconut taste.  They're not nearly as good as blueberry or apple cinnamon pancakes, in my opinion.  If you love coconut they're good, as treat, but not for every Sunday morning. 

Mini Apple Cheddar Handpies  inspired by Dinner with Julie's Pie Party
The above link doesn't really have a recipe, but go to check out the pie party anyway.  Amazing.
So for the mini pies I made pie crust and added about 1.5 cups of finely grated aged white cheddar.  For the filling, I chopped a few apples really small and tossed them in cinnamon, nutmeg, brown sugar and a little maple syrup.  I cut the pie crust into little circles, filled the inside, topped with another circle and pinched the edges together with a fork.  DELICIOUS deserves to be in caps.  
I've made them a second time and used puff pastry to make a quick turnover crust/put the cheese in with the apples.  Tasty and much quicker.

Monkey Bread
My grandma used to make this when I was a kid, and I forgot all about it.  I don't know why or how that could have been.  I made it from scratch, using this recipe, which took a lot of time.   Next time I think I'll try it with the premade biscuit dough, just to see if there's a big difference in taste.  I served this at our Superbowl party and it was a huge hit. 

I also made this Carmelized Onion Tart for Superbowl, but it smelled so good that it was eaten right away and no photographic evidence exists. 

Have you cooked anything from your Pinterest boards?  I'd love to know what was successful!

Monday, January 23, 2012

The Perfect Chewy Chocolate Chip Cookie

I am so excited to have found the absolute perfect chewy chocolate chip cookie recipe!
Steve's birthday was last week and instead of a cake he wanted chocolate chip cookies.  But chewy ones.
I searched the internet for recipes, and came across the few I had already tried.   I had never tried Martha's recipe and decided to do it, but make a few adjustments. 

Soft and Chewy Chocolate Chip Cookies by Martha Stewart

Ingredients

  • 2 1/4 cups all-purpose flour
  • 1/2 teaspoon baking soda
  • 1 cup (2 sticks) unsalted butter, room temperature
  • 1/2 cup granulated sugar
  • 1 cup packed light-brown sugar
  • 1 teaspoon salt
  • 2 teaspoons pure vanilla extract
  • 2 large eggs
  • 2 cups (about 12 ounces) semisweet and/or milk chocolate chips

Directions

  1. Preheat oven to 350 degrees. In a small bowl, whisk together the flour and baking soda; set aside. In the bowl of an electric mixer fitted with the paddle attachment, combine the butter with both sugars; beat on medium speed until light and fluffy. Reduce speed to low; add the salt, vanilla, and eggs. Beat until well mixed, about 1 minute. Add flour mixture; mix until just combined. Stir in the chocolate chips.
  2. Drop heaping tablespoon-size balls of dough about 2 inches apart on baking sheets lined with parchment paper.
  3. Bake until cookies are golden around the edges, but still soft in the center, 8 to 10 minutes. Remove from oven, and let cool on baking sheet 1 to 2 minutes. Transfer to a wire rack, and let cool completely. Store cookies in an airtight container at room temperature up to 1 week.

For one, I don't use an electric mixer.   I might as well burn a few calories stirring, if I'm about to eat a bunch of cookie dough to taste if it's ok.   Also, I hate washing all the extra pieces.   A fork works fine for crushing the butter into the sugar.

Second, add the chocolate chips to the gooey stuff before the flour.   If you overmix flour things get tougher.   If you add the chocolate chips last, you would have stirred the flour twice as much as needed.

Third, I think Martha (or one of her hundreds of employees) missed a step here.   Chill the dough.   It's gotten warm and gooey and sticky while you mixed it, and would melt too fast when placed on the baking pan and into the oven.    Chill it for 15 mins even, and the cookies will be thicker and chewier in the end. 

By the time I had the chance to take pictures of the cookies there were only 3 left!

Do you have any perfected recipes for classic foods? I'd love to know. 
Happy baking!

Friday, November 4, 2011

Making my Mom's Birthday gift (Saucer turned necklace)

Now that my Mom has safely gotten her parcel in the mail, and is enjoying her necklace, I can show you.  It all started with a trip to Goodwill.  (It usually does.)  
I found a really pretty teacup saucer that was chipped.  
I wondered if it was possible to save this lovely pattern from a trip to the dumpster. 
So yes, I took my cute little chipped plate, put it in a sealed plastic bag & dropped it on my tile floor.
Post-smash I chose my favourite little remain and drilled a hole in it with my rotary tool.
About an hour of cautious drilling later.
I also used the tool to sand down any rough and sharp edges, then added a jumpring and some chain.
And there you have it - the necklace I made my mom for her birthday, which just happened to look perfect with the purple sweater I bought her too.

p.s.  I toyed with the idea of adding some beads or little charms, but knowing my mom's taste, I kept it simple.   However, I do have a few pieces of pretty plate left, and may make some other variations.
I've also since found some more chipped plates and saucers - score!


Monday, October 31, 2011

Ghosts of Halloween Present

Here it is - the moment you've been waiting for!
I present our Halloween costumes - 2011.
Steve is Van Gogh self portrait, and mine is Portrait of Madame Metzinger.
Here's the original of mine, as reference:
I'm really happy with how they turned out :)
Our friends are also awesome in the dress-up department, check out some of their costumes!
Little Dragon J - I didn't get a good shot of his parents, but they were a King & Queen.
K & F as 80's rockstars. Love the wigs.
A + D as Popeye and Olive Oil.   Note how hilarious D's arms/gloves/hands are - they made for some entertaining moments. 
C & K were Harry & Marv from Home Alone.  Awesomesauce.
And K made these witch finger cookies.  They looked so gross, but were delish!

How was your Halloween?  What did you dress up as?
Link to pics in the comments, I'd love to see!

Sunday, October 30, 2011

Ghosts of Hallowe'ens Past

I love Hallowe'en.
  Not really because of the scary movies, pumpkins or candy, well ok the candy too.
I love it the most for the costumes. 
I did a little bit of digging through the archives, to share some of the costumes I've worn over the past few years.   No cat ears allowed.
One of my faves as a kid.  Slice o' pizza.  Proudly wearing my UNICEF collection box, and trick-or-treating with my bro and sis. 
Marie Antoinette was my fave costume of all time.  I made the entire outfit myself, in a fit of sewing inspiration.  (Ordered the wig online.) My friend A was a beautiful raven. 
Steve and I spent one year hopping around potato-sack-style in a duvet, dressed as John Lennon and Yoko Ono during their Bed in For Peace.  
Shout outs to Bry (Casey Jones of TMNT fame) who blogs too.
Last year I was a Rockford Peach - any other fans of A League of Their Own?
Steve was a Saturday Night Live character, which I hope you know, if not, I suggest you watch.

I'll be back tomorrow with pictures from this years Hallowe'en party.
What's your favourite costume you've ever worn?
I've got to dig out pictures from the other 24 years of my life!

Tuesday, October 25, 2011

Lemon cookies are the best thing in the world.

I love lemon.  Lemon cookies are the best thing in the world.  
Oh yes, best enough to mention that twice.
I found this recipe a few months ago on the Whisk Kid blog, and made these on a rainy afternoon. 
Over on her blog she made them thinner and crispier, but I like nothing more than chewy cookies.  
So I made them thicker, and they were lovely. 
Especially when served with tea, fresh roses and a good book. 
Lemon Cookies
1/2 c (118 g) unsalted butter, room temp
3/4 c (149 g)sugar
1 egg, room temp
1 1/2 Tbsp lemon juice (I just used the juice of half a lemon)
1 1/2 Tbsp lemon zest (I used the zest from the whole lemon)
1/2 tsp vanilla
1/2 tsp baking powder
1/4 tsp baking soda
1/4 tsp salt
1 1/4 c (156 g) flour

Preheat oven to 350F (175C).
Cream together the butter and sugar, then add the egg, juice, zest and vanilla. Sift in the dry ingredients and mix until just combined. Drop by 1 1/2 tsps onto lined baking sheets and bake 10-12 min until lightly golden around edges. Let cool on sheets one minute before placing on racks to cool completely.   Makes about 2 dozen.

Lemon Icing
1 c (150 g) icing sugar
4-6 Tbsp lemon juice

Beat together and drizzle over cooled cookies. 

 Enjoy the deliciousness!
What's your favourite cookie?


Saturday, October 15, 2011

How to Make Perogies


I hope I don't get in trouble from my family for sharing this recipe ;)
This is a staple crucial item at holiday dinners.  I just made them for our (Canadian) Thanksgiving, and decided to document the process. 
The dough recipe is really simple. 
4 cups of flour
2 eggs
1/2 teaspoon salt
about 1 cup of water
1/2 cup softened butter or margarine

For the filling you can get creative.  The classic is mashed potatoes with a few cups of shredded cheese (to taste) mixed in while the potatoes are hot.  I've also had potato and cottage cheese, jalapeno ones, ricotta and spinach and I haven't tried, but I know blueberry dessert ones exist. 
Back to the classic.  While your cheesey mashed potatoes are cooling, mix your dough.  If the dough is too dry, add more water.  Too wet? Add some flour.
Knead the dough about a hundred times to get the softest dough you've ever seen. 
Roll out the dough onto some parchment paper.  
Don't roll too thin, you don't want holes in the dough, but too thick will make tough perogies.  If you have a round cookie cutter, congrats.  If not, use a drinking glass to cut the dough into circles.  

Plunk a spoonful of the cheesey potatoes onto the dough circles.  
Fold the dough circle around the filling and pinch the edge closed.  
Don't let the potato get in the way of the pinch, it won't stick properly. 

Repeat until you've run out of dough! This made 5 dozen perogies for me. 
(I used about 8 large potatoes and a half brick of old cheddar for the filling.)
Be careful to never stack the little pouches of deliciousness - they are very sticky. 
You're almost done! Fry some onions in butter.  Cook the perogies by boiling in water for 3-4 minutes, or until they float to the top.  Toss in melted onions and butter and serve!

If you'd like to freeze them you can.  Before cooking, place perogies in single layer on parchment paper on a cookie sheet in the freezer.  When frozen, toss into a container and store.  

Leftovers can be microwaved or fried in a pan to be extra unhealthy/crispy on the outside :)
Serve with sour cream, plain yogurt, or even salsa - sooo tasty!

Enjoy! And let me know if you make them!
Does your family have any must-have recipes?


Monday, October 10, 2011

How to Make a Ribbon Wreath for Fall - DIY


I was in the mood for something festive for our apartment door, so I put this little wreath together. 
I wanted something that was small and easy to store in our little apartment.  Not much space for big foam wreaths around here.   It's so easy and simple that you can do it late at night, while catching up on tv shows, and not miss any jokes or plot points.
Speaking of late at night, please excuse the crummy process photos - it was a night too lazy to pull out the SLR and light things.  

1. You will need:
Cardboard
Loads of Ribbon in several colours and widths (I believe I used 9 yards)
Spare fabric (I used an old t-shirt)
Hot glue gun (or a lot of straight pins)
Scissors
Tape
2 round objects to trace
2.  Trace round objects and cut out circles in the cardboard.  Mine was thin so I doubled up.
 Also, cut fabric into strips - 3 or 4 inches wide. 
3.  Wrap the fabric strips around the cardboard circles until the cardboard is hidden.  Secure the ends. 
4.  Cut ribbon into roughly 4 inch lengths for wide ones, 2.5 inches for the skinnies.  Place them evenly around the circle.  Fold in half, allowing for a pretty ribbon loop and pin or glue to the wreath.  Repeat until your wreath is full and you've run out of ribbon!
voila!  A sweet little wreath to decorate your door (or your floor, as seen here).
I hope you had a great weekend, whether you celebrated Thanksgiving like us Canadians, Columbus Day, or just the end of the week :)
I'm so thankful for the phenomenal weather we had!

Tuesday, January 4, 2011

my fave way to arrange flowers. cheap, inexpensive, recycled arrangement.


The weather in toronto last week was strangely warm.  
All of the snow melted, and it felt like spring was here.  
It's still the first week of January, and we have new snow now, but mentally i have moved on.  

So i treated myself to a $4 bouquet of white chrysanthemums. (mums for short)
 I rummaged around my apartment for all of the glass containers I could find.  They include a wine carafe, pop bottle, homemade pickle jar, spice jars and vintage vases & perfume bottles.

 After filling all the jars with water, I began by placing flowers into the smaller jars first.  I wasn't sure if I would use all of the vases, so I started with my favourites. 
 After making sure all the vases had flowers, I set them on the table - beginning with the largest ones, then fanning out with the smaller ones.
 Play with the arrangement of vases until you are pleased with it. 
 And voila! your table looks pretty and ready for spring.
Random tips:
Mums like to be broken with a tear, rather than slicing the bottom like you would a rose.
If your florist doesn't give you any "flower food" you can add a little sugar to the water in the vase.
Remove any leaves that would be below the surface of the water - they will rot very quickly.
Bunch flowers together with an elastic near the bottom - they will spread more evenly.

Variations:
Different sizes of tin cans
Wrapping coloured ribbon on the vases
Mixing different types of flowers would be really pretty
Add food colouring to the water - the jars will have more colour, and eventually the white flowers will drink the coloured water and change the flower heads.  Beautiful and fun for kids to learn about plants.

Have fun!

LinkWithin

Related Posts with Thumbnails