Showing posts with label tutorial. Show all posts

Saturday, October 15, 2011

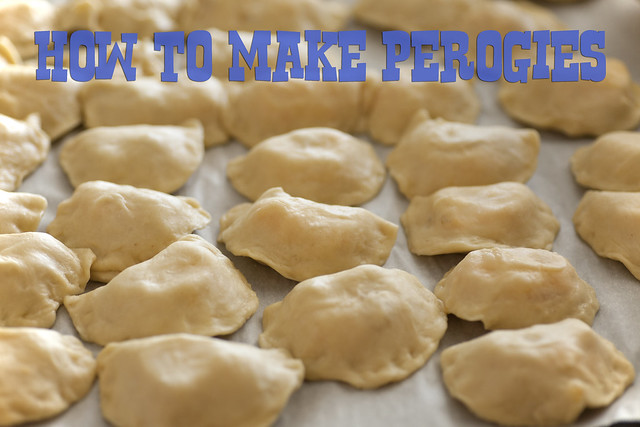
How to Make Perogies


I hope I don't get in trouble from my family for sharing this recipe ;)
This is a staple crucial item at holiday dinners.  I just made them for our (Canadian) Thanksgiving, and decided to document the process. 
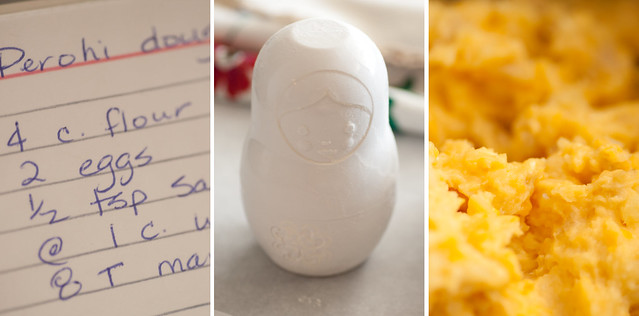
The dough recipe is really simple. 
4 cups of flour
2 eggs
1/2 teaspoon salt
about 1 cup of water
1/2 cup softened butter or margarine

For the filling you can get creative.  The classic is mashed potatoes with a few cups of shredded cheese (to taste) mixed in while the potatoes are hot.  I've also had potato and cottage cheese, jalapeno ones, ricotta and spinach and I haven't tried, but I know blueberry dessert ones exist. 
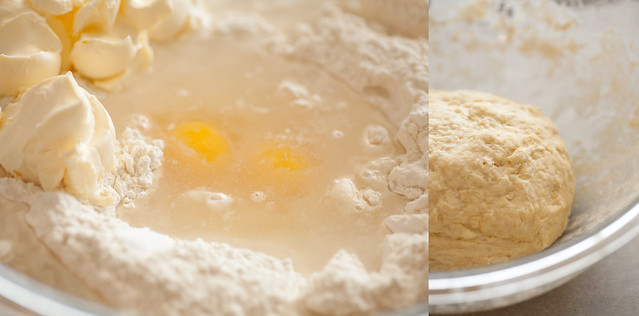
Back to the classic.  While your cheesey mashed potatoes are cooling, mix your dough.  If the dough is too dry, add more water.  Too wet? Add some flour.
Knead the dough about a hundred times to get the softest dough you've ever seen. 
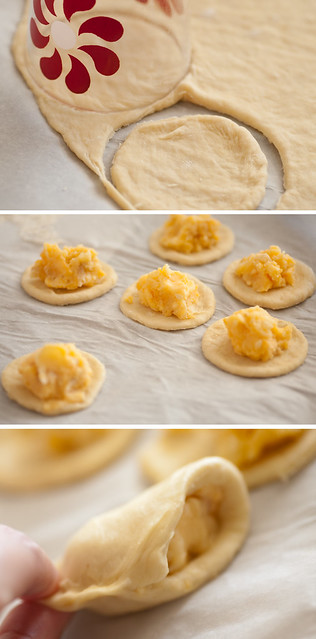
Roll out the dough onto some parchment paper.  
Don't roll too thin, you don't want holes in the dough, but too thick will make tough perogies.  If you have a round cookie cutter, congrats.  If not, use a drinking glass to cut the dough into circles.  

Plunk a spoonful of the cheesey potatoes onto the dough circles.  
Fold the dough circle around the filling and pinch the edge closed.  
Don't let the potato get in the way of the pinch, it won't stick properly. 

Repeat until you've run out of dough! This made 5 dozen perogies for me. 
(I used about 8 large potatoes and a half brick of old cheddar for the filling.)
Be careful to never stack the little pouches of deliciousness - they are very sticky. 
You're almost done! Fry some onions in butter.  Cook the perogies by boiling in water for 3-4 minutes, or until they float to the top.  Toss in melted onions and butter and serve!

If you'd like to freeze them you can.  Before cooking, place perogies in single layer on parchment paper on a cookie sheet in the freezer.  When frozen, toss into a container and store.  

Leftovers can be microwaved or fried in a pan to be extra unhealthy/crispy on the outside :)
Serve with sour cream, plain yogurt, or even salsa - sooo tasty!

Enjoy! And let me know if you make them!
Does your family have any must-have recipes?


Monday, October 10, 2011

How to Make a Ribbon Wreath for Fall - DIY


I was in the mood for something festive for our apartment door, so I put this little wreath together. 
I wanted something that was small and easy to store in our little apartment.  Not much space for big foam wreaths around here.   It's so easy and simple that you can do it late at night, while catching up on tv shows, and not miss any jokes or plot points.
Speaking of late at night, please excuse the crummy process photos - it was a night too lazy to pull out the SLR and light things.  

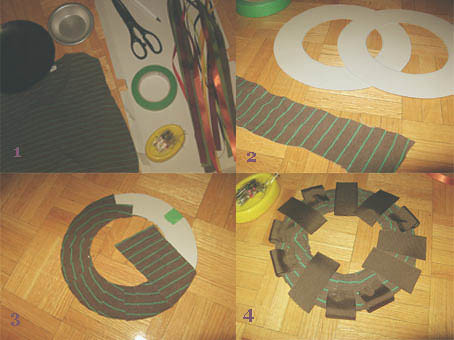
1. You will need:
Cardboard
Loads of Ribbon in several colours and widths (I believe I used 9 yards)
Spare fabric (I used an old t-shirt)
Hot glue gun (or a lot of straight pins)
Scissors
Tape
2 round objects to trace
2.  Trace round objects and cut out circles in the cardboard.  Mine was thin so I doubled up.
 Also, cut fabric into strips - 3 or 4 inches wide. 
3.  Wrap the fabric strips around the cardboard circles until the cardboard is hidden.  Secure the ends. 
4.  Cut ribbon into roughly 4 inch lengths for wide ones, 2.5 inches for the skinnies.  Place them evenly around the circle.  Fold in half, allowing for a pretty ribbon loop and pin or glue to the wreath.  Repeat until your wreath is full and you've run out of ribbon!
voila!  A sweet little wreath to decorate your door (or your floor, as seen here).
I hope you had a great weekend, whether you celebrated Thanksgiving like us Canadians, Columbus Day, or just the end of the week :)
I'm so thankful for the phenomenal weather we had!

Tuesday, January 4, 2011

my fave way to arrange flowers. cheap, inexpensive, recycled arrangement.


The weather in toronto last week was strangely warm.  
All of the snow melted, and it felt like spring was here.  
It's still the first week of January, and we have new snow now, but mentally i have moved on.  

So i treated myself to a $4 bouquet of white chrysanthemums. (mums for short)
 I rummaged around my apartment for all of the glass containers I could find.  They include a wine carafe, pop bottle, homemade pickle jar, spice jars and vintage vases & perfume bottles.

 After filling all the jars with water, I began by placing flowers into the smaller jars first.  I wasn't sure if I would use all of the vases, so I started with my favourites. 
 After making sure all the vases had flowers, I set them on the table - beginning with the largest ones, then fanning out with the smaller ones.
 Play with the arrangement of vases until you are pleased with it. 
 And voila! your table looks pretty and ready for spring.
Random tips:
Mums like to be broken with a tear, rather than slicing the bottom like you would a rose.
If your florist doesn't give you any "flower food" you can add a little sugar to the water in the vase.
Remove any leaves that would be below the surface of the water - they will rot very quickly.
Bunch flowers together with an elastic near the bottom - they will spread more evenly.

Variations:
Different sizes of tin cans
Wrapping coloured ribbon on the vases
Mixing different types of flowers would be really pretty
Add food colouring to the water - the jars will have more colour, and eventually the white flowers will drink the coloured water and change the flower heads.  Beautiful and fun for kids to learn about plants.

Have fun!

Thursday, July 22, 2010

DIY: how to remove scratches from hardwood floors

i realize this is completely and utterly random, but i have to share this with you.
walnuts. 
they are the secret to removing/buffing out scratches in hardwood floors!
witness the before and after:
oh yeah!  all you have to do is rub a walnut all over it.  apparently the natural oils in the nut will buff out the scratch.  (it worked well enough to please our landlord when we moved)

Friday, June 25, 2010

how to make a newsboy cap

this may seem like a random thing to post but i can explain.
i am currently working on a historical documentary film. as half of the 2 person wardrobe department, which includes, among other things, dressing about 400 extras over 2 weeks of filming.
date range from 1910-1936. whoo hoo!
it's keeping me busy from roughly noon-2am for 3 weeks.
here's a scene they want to recreate:
and so - the newsboy caps.
cut out a pattern that looks like this - essentially a large circle with a smaller one inside.
i've got 22 inches across the big outside one, then within it drew a 16 inch one. folding the paper made it easier to cut the triangular wedges out.
for the moon shaped piece i traced the edge of a baseball cap and it's about 3 inches across at the centre of the 'moon.'
in a tweed-ish fabric, cut one of the large piece and 2 moon shapes. then cut one moon of cardboard or plastic. (i used cereal box cardboard but i'd recommend something more solid & washable if you'll be using the hat for more than a one time costume - ie part of a pop bottle. you'd also want a lining.)
p
pin the brim pieces together and pin the large piece so each triangle cut out becomes closed again.
the hat will start to take shape...

when sewing the main part of the hat, curve toward the centre as you go - it will make the hat more circular on top. put the cardboard in the brim and sew it right sides together to the main part of the hat. tada.
that was easy right? uhhh... ha ha sorry. it is more simple to do than it is to explain...
repeat as needed.

i'll see you again when the film is wrapped. so happy canada day this thursday!

Update:  While I appreciate the interest, I have been getting emails and questions about this post daily.  It has been over 4 years since I have made the hats.
Yes the pattern size was as described.  If the hat is too big, sew with larger seam allowances and remember that the floppy excess gets pulled forward and tacked to the brim. 
Adjust the pattern for hats for children. 

Saturday, March 6, 2010

Pretty Pretty DIY Crochet Bowls!

Happy Saturday Everyone - I present to you my very first crafty DIY!
You will need:
crocheted fabric doilies
cornstarch
water 
balloons
in total the materials cost under $5

depending how much fabric stiffener you want to make - mix 1 part corn starch with 2 parts cold water to make a thick paste, then add 16 parts boiling water.
(i used 1/4 cup cornstarch, 1/2 cup cold, 4 cups boiling)
this is the same recipe used for turning any fabric into wallpaper - 
but i dare not do that to the peeling walls in this apartment.
 blow up your balloons to the size of your doilies, while letting the cornstarch mix cool off 
so you don't burn your fingers ;)
when the mix is cooled, immerse the doily and get it coated in the gooey mess. 
then lay it over a balloon, smoothing out any bubbles.

let the balloon rest in a mug to keep its balance.

i also used a little bowl to make a smaller shape, but learned the hard way that i should have placed a layer of plastic wrap between bowl and balloon. oops.


let everything dry. (this took about 24 hours)

removing the balloons was trickier than expected.  at first i just poked a hole in the balloon, but the doily stayed stuck and warped in shape.  it worked much better to slowly pry the balloon away with my fingers while it was still inflated, popping it after. 

and voila! you can use them to store all kinds of little things.  i think they'd be really pretty filled with candies, mini ones as wedding favours or as centrepieces.
send me a link if you make them, i'd love to see yours.
oh! and an extra cool feature - if you wash the doilies out in water they will return to their original flat state.  which means i can put them in my suitcase and bring them to canada when i move :)

Tuesday, December 15, 2009

recycled paper christmas trees

i was bored one sunday, and wanted some christmas decorations for our apartment, but everything was closed, so i dug up what i could find... 

these are the supplies. 
cereal box, tape, stapler and the awesome green striped printer paper i found at my school.

cut the cereal box into a semi-circle shape. trace a plate or freeform - it works.
the larger the circle, the taller the tree.


roll & staple the cardboard to make a cone shape.  the rounded part of the semi-circle will be the base.


cut many leaf shapes from the paper. mine average about 1.5 inches long and i used 2 pages of paper.

tape the leaves onto the cone in layers.


continue until you've covered the tree, and voila!


LinkWithin

Related Posts with Thumbnails